Earlier this month I was lucky enough to head over to Shenzhen, China, for Dangerous Prototypes' Hacker Camp and Maker Faire Shenzhen. I flew over with Jon Oxer (from Freetronics), and Mitch Davis (from Hackvana) was on our flight as well. Good Melbourne contingent!
Ian from Dangerous Prototypes has put a great series of day-to-day blog posts up on the Hacker Camp mini-site explaining the full program, so I won't bore you by repeating them. Needless to say he and Jin, and the other organisers, did an insanely great job of showing us all the things they love about living in Shenzhen. I want to highlight just a few things from the trip that stood out for me.
Huaqiangbei Markets
I remember reading bunnie's blog posts about Huaqiangbei back in 2007 (wow was it really that long ago?) From that moment Shenzhen and Huaqiangbei gained a mystical "electronics nerd paradise" status, for myself and I'm sure for many others. When Mitch & Jon first took me to the most famous Huaqiangbei building, SEG Plaza, they made a point of taking "before" and "after" photos to document the moment my mind was blown.
Thankfully, Jon has not shared those particularly dorky photos with the internet, but this photo of me gawking at a rack of tools remains:
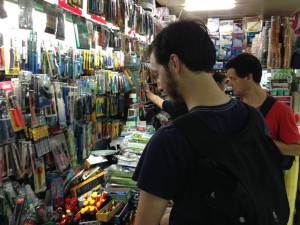 First time in SEG Plaza, looking at tools. Photo by Jon Oxer.
I'd been to Akhihabara, and to the Mangga Dua electronics malls in Jakarta, so I thought I had some frame of reference. Really I had nothing to go on, the scale of the Huaqiangbei district has no parallel. Exhausting too, after a couple of hours I was feeling drained from over-stimulation.
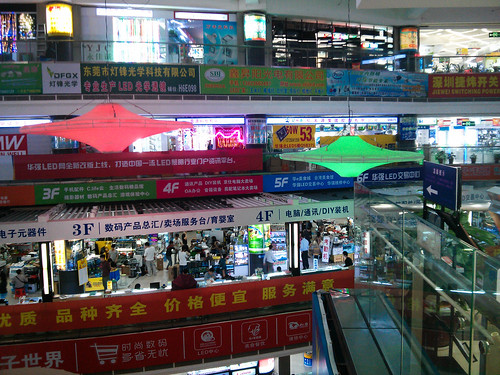
I did learn that some objects are hard for newcomers to find in Huaqiangbei, just due to the scale. I had a short list of esoteric components and tools that were hard or expensive to source in Australia. I never found most of them. The bulk of the Huaqiangbei market stalls are geared to selling the most popular components used by factories in the Shenzhen region. A factory will order ahead what they need, then send someone down on an electric motorbike to pick the parts up. So it seems most stalls sell parts that are needed at short notice by factories, or used by a lot of factories.
Rarer parts can be found, but it seems sometimes you have to really dig for particular items. I'm told they are more commonly just sold online via Taobao (like Chinese ebay) or other sites. Taobao sellers are insanely efficient. Shipping is very cheap ($2AU or less for most items), overnight between major cities and often same day within the same city. In Shenzhen sellers will send an electric bicycle or tricycle courier direct to your door with the order.
Since getting back to Australia I've started exploring the colourful world of Taobao agents, who buy from Taobao inside China and then ship your goods overseas. Not quite as efficient or cheap, but Taobao is a whole unique world of colourful e-commerce to explore! If I gather any tips I'll make sure to share them.
Soldering Workshop
Another of the huge markets in Shenzhen is the used cell phone market. You can tell you're nearby when you see people sitting in the street, shelling old cell phones like crustaceans and stacking the parts into sorted heaps.
 "Salvaging". Photo by talsit de cod.
Low labour costs and a demand for mobile phones has led to an advanced but "lo-fi" repair culture. This is made obvious at the Shenzhen Mobile Repair School, a training school located directly above the cell phone market!
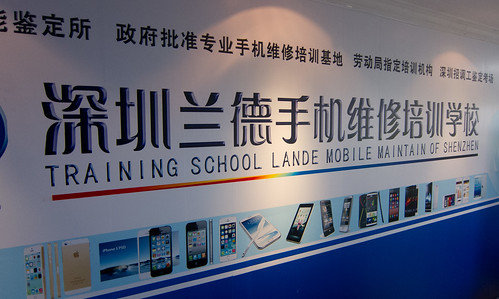
Ian and Akiba (Freaklabs) booked us in to learn some of the secrets of the mobile repairers!

BGAs a-plenty
The main focus of the workshop was learning how to re-ball BGAs, using simple hot air equipment, a normal soldering iron, and a $1 metal stencil. About $80 worth of equipment all up, if you were to buy it in the markets.
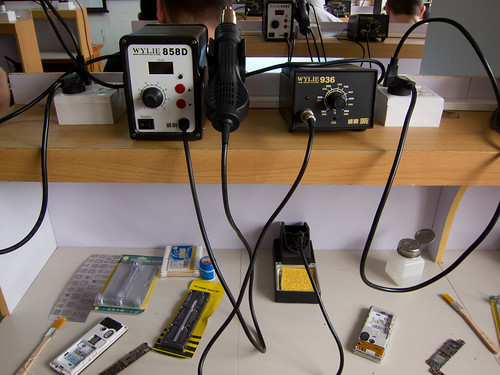
I've never considered myself more than "barely good enough" at soldering, and even I reballed a 0.8mm pitch BGA perfectly on my second try. By the end of the first session Jon had a 0.6mm pitch ARM CPU looking pretty good!
Dangerous Prototypes have made a video walkthrough of the reballing process, that I think they'll be releasing soon. They also put together a Reballing Practice Kit that you can buy through Seeed Studio. I brought back a couple as Hackerspace presents!
Reballing old mobile phone components may seem like a useless novelty, but one of the reasons I've never designed a board with a BGA is thinking I'd be stuck if it needs rework. To me BGA has always been something that only people with expensive tools got to work with, and now I see that it's not so hard after all!
Or, to put it in Denisa Kera's words:
Just like the anatomical theater in the Renaissance destroyed the sacred status of the human
body that only the church had a right to regulate (christen or bury), BGA reballing in
Shenzhen in the Mobile phone repair school enabled us to take control over our most personal
of all communication tools, the mobile phone
:)
iPhone boards
Bunnie had visited the markets and bought back some virgin iPhone 5 mainboards to the Repair School. Sold as a factory panel of four, they were probably in the markets after failing a test at the factory.
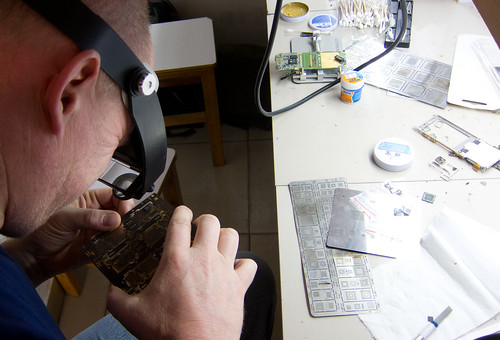
Bunnie challenged our teacher to solder, desolder, reball and resolder some BGAs from the iPhone board. Which he did without any difficulty, and without needing any magnification equipment. "The masters in the factories don't need magnification, so noone uses it!"

Some of us used magnification to admire his handiwork, though!
Test rigs
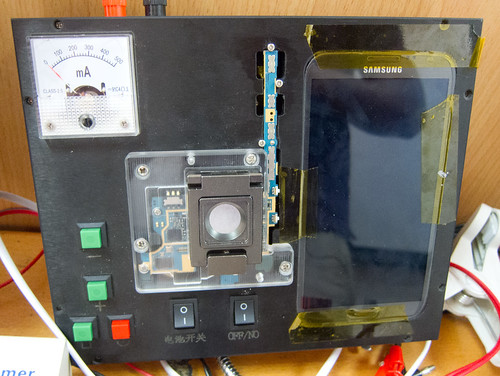
The mobile phone repair school also showed us some of their test rigs. These rigs are for testing individual chips - CPU, RAM or Flash. The rig combines a phone mainboard with a separately mounted screen, power connector, and custom made BGA sockets for the chips to be inserted and tested.
Here's one for Samsung Galaxy Note:
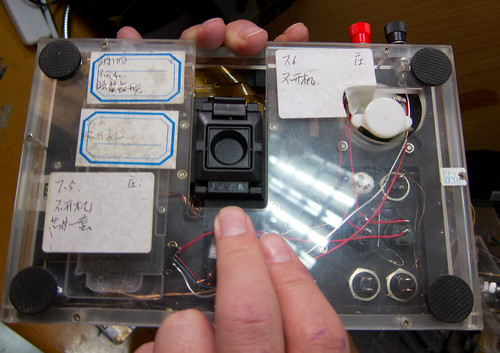
And iPhone 4:

The back of the iPhone 4 rig has a second BGA socket, for RAM or Flash:
The workmanship on display was very impressive, precision custom test equipment on a shoestring budget! These BGA packages need dozens if not hundreds of high speed impedance controlled traces, and just bundling them into a custom made BGA socket probably doesn't meet the design specifications. But it clearly works!
The analog current meters at top left of the rigs are not there by accident, either. The teacher explained that a repairer can diagnose which mobile phone subsystem is not working, based solely on the total current draw of the phone. In the markets you can apparently buy books describing each phone's current draw over time as it starts up, and which component is responsible for what aspect. Analog panel meters are popular because they have a faster response time than cheap digital multimeters.
This last test rig was an iPad 2 mainboard tester. It breaks out all the peripheral connections, and the mainboard is connected via a jig and a set of pogo pins:
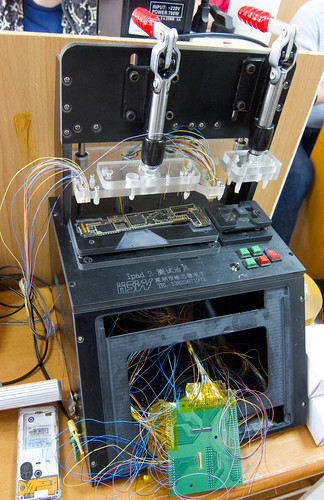
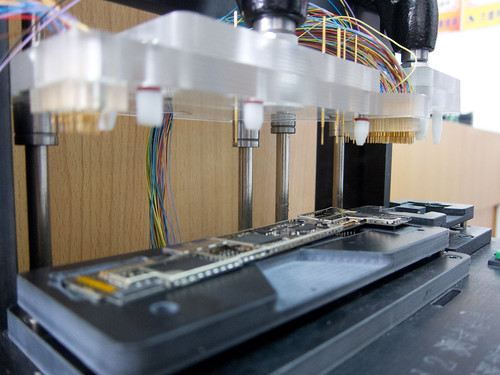
The jig was all CNC milled acrylic, with precision inserts to exactly position each pogo pin.
Even the blinds in the cell phone repair school were PCB themed:

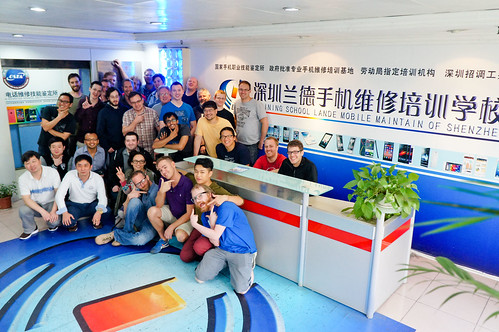 School's over, class photo by Akiba/freaklabs
Great Camp
Those were some of my personal highlights from Hacker Camp. And that's without even touching on all the great people I met, and all the great food and drink. Extremely grateful to Ian, Jin, Akiba, Zach, Tully, Bunnie, Connie and Joe for organising!
I also haven't touched on some of the equipment and parts that I brought home. There will definitely be a post about the cheap IR reflow oven that I picked up, after I've put it through its paces.
If you want to see more of Hacker Camp, there are some great photo albums out there:
- Akiba from Freaklabs was snapping great stuff the whole time.
- talsit de cod took some fascinating "street photography" style snaps in the markets, a place where you'll often be thrown out for photographing.
- My photos from Hacker Camp are here
- Richard Sim from Vancouver Hacker Space got some great shots as well
- Jon Oxer made lots of Facebook posts while we were over there. I'm hoping he'll eventually transfer them to his blog for posterity. If you look there you'll get to see us posing with one of our favourite market sellers, in his 1x2m cell phone tool stall:
 Posing with myself and Jon. Photo by Jon Oxer
Stay tuned for a follow up post about Maker Faire Shenzhen, which started the day after Hacker Camp...
EDIT: Published as Shenzhen Trip Part 2 - Maker Faire Shenzhen
Thoughts on “Shenzhen Trip Part 1 - Hacker Camp”